Pages

Monday, March 16, 2015

The Memory Nest March Sketch #36 - Meeting Jack

Hello everyone!   It is time for the second Sketch Challenge 
for March from The Memory Nest Blog.
This sketch was created by Crystal Schneider. I really like the "blockiness" of it - is that a word? - I don't think so, but hey, take a look at the sketch below and you'll  know what I mean!


First off - even though we as DT Members are given the sketch the month before, in this case February, I just wasn't "feelin'" the HEARTS at the time - Soooo - you know me (- I NEVER Scrap in chronological order -)  I decided to take you back a few months, oh, and a few years too 
- back to October of 2012!!

I really "scrapped my stash" here! I used a piece of Black Bazzill Cardstock for the base page.  The 2 strips of Halloween Pattern Paper have been hanging around FOREVER! as well as many of the embellishments too!  

The photos were taking in October 2012, on our first trip to Disneyland.  We are BIG Jack Skellington fans - (well, I am a BIG Jack Skellington fan, my hubby just follows my lead!) and I was SO excited to get to "meet him!"  We were there during Mickey's Halloween Party and LOVED all of the Halloween decorations throughout the park, especially how they change The Haunted Mansion Ride to 
"The Nightmare Before Christmas!"
You can see lots of embellies here.  In place of the hearts I used Mickey heads, chipboard swirls, spiders and even Mickey himself!  When printing the 2 vertical photos through Shutterfly, I selected the Halloween overlays that they offer.  I LOVED the look of the white zig-zag line, so I took my White Gel pen and used it to make my own lines on the black cardstock, all along the perimeters, to mimic the look on the photos. I also added Disneyland and the date in the lower right hand corner.  I LOVE how it turned out!

I thought this little Mickey Sticker was perfect for the photo of Jack!  Here you can also see a close-up of the lines that came on the photo, and the ones that I added to the layout.

If you've visited my blog before, you know that I love to make hidden pockets by adding my photo mats with with 3D Foam Dots on 3 sides, the slipping a tag with journaling about the photos on the layout inside.  This tag was inked with orange and black distress stains, and I added some Washi Tape, a bug sticker and some fun fibers to it too!  ( Now scroll back to the top of the post and see how it looks tucked in behind the lower left hand photo)

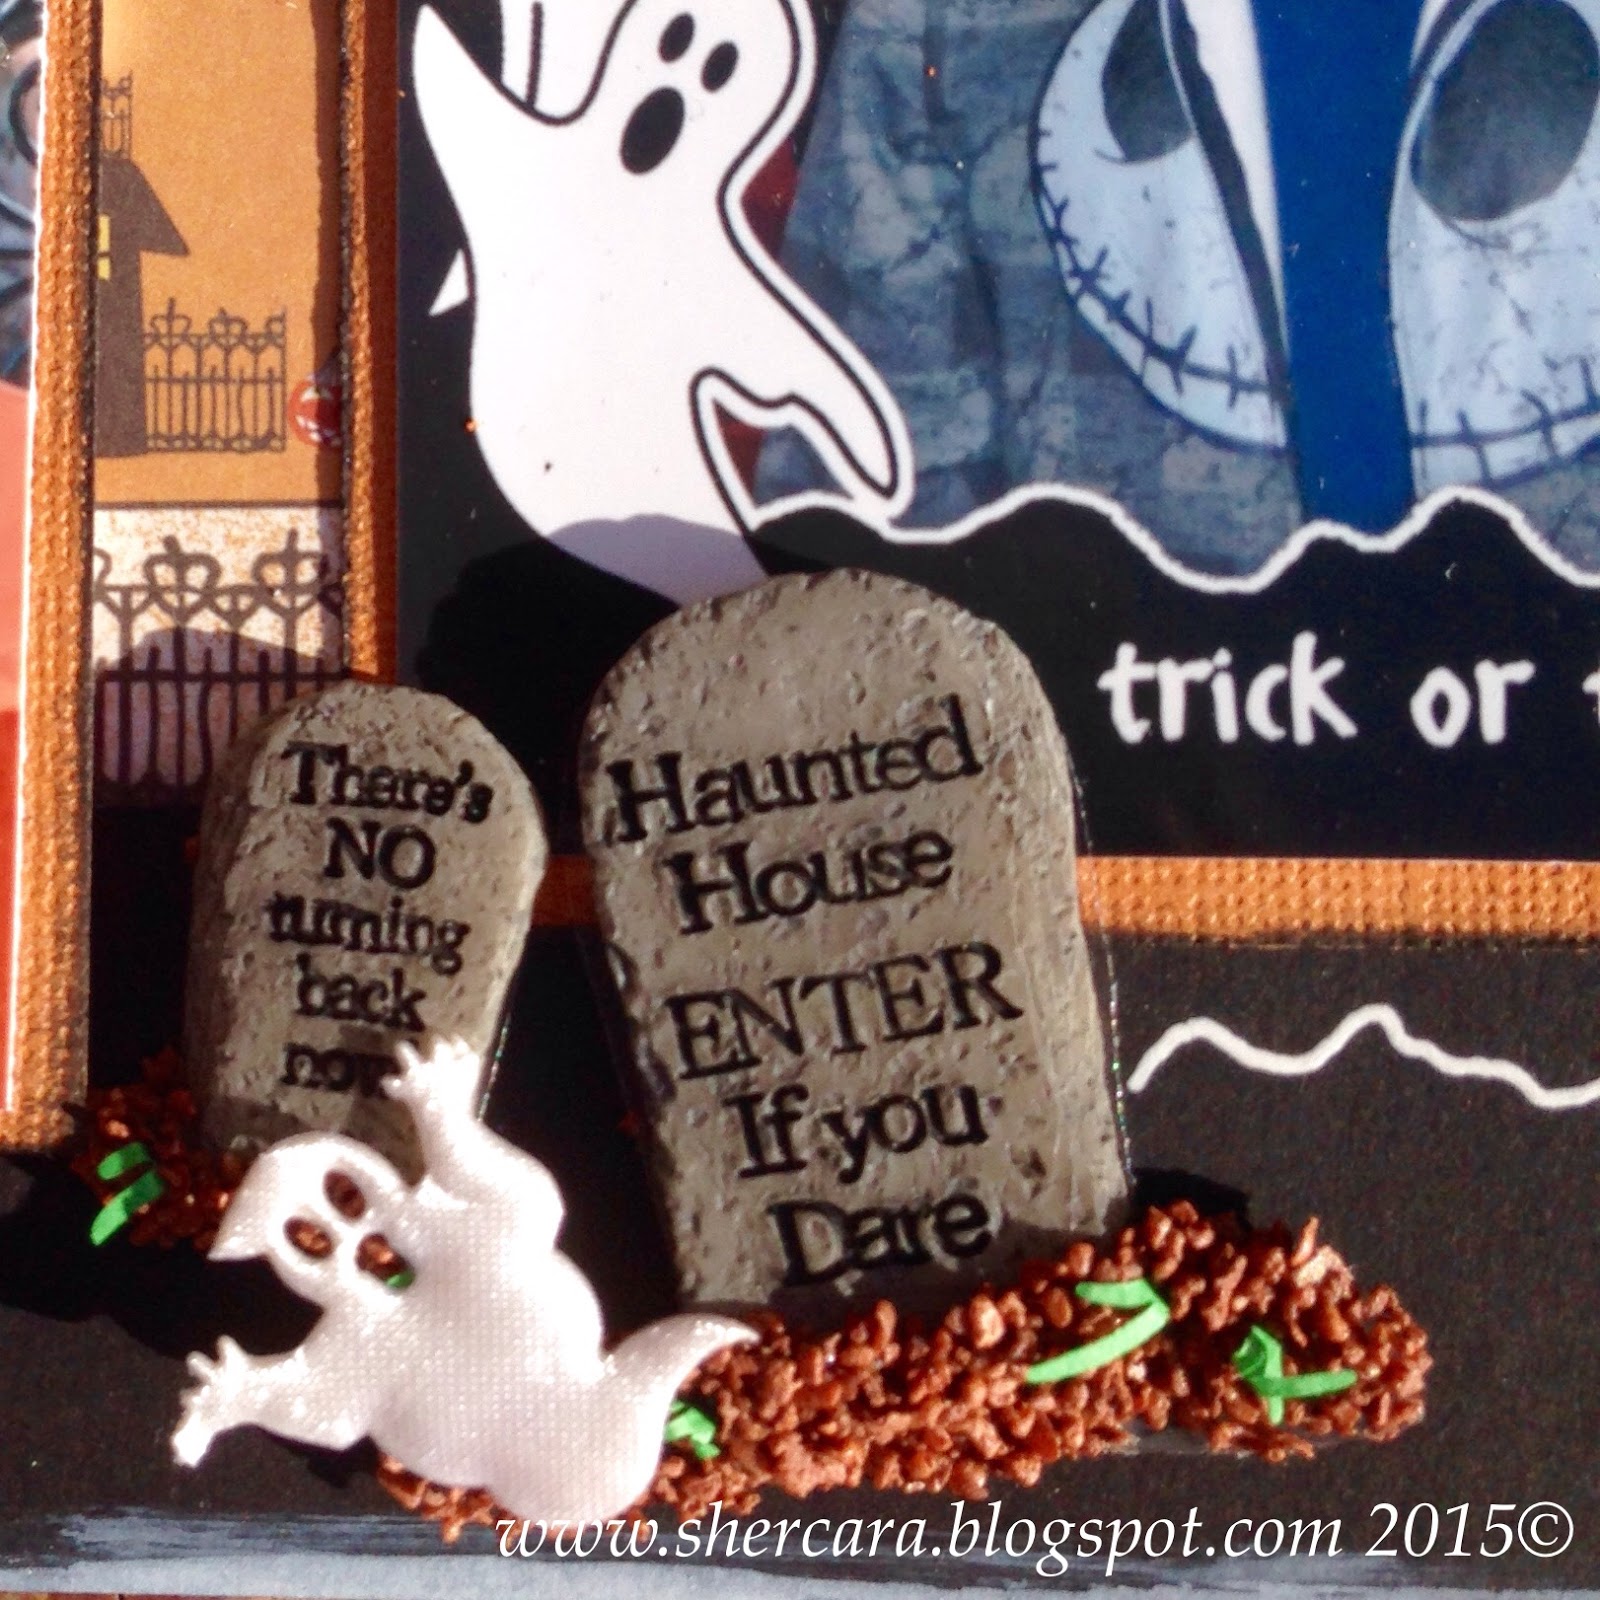
In keeping with the Haunted Mansion theme, these cute little tombstone 3D stickers came in the same pack with the frightened Mickey sticker  - ( yes I did replace the hearts in the sketch with tombstones!! LOL!!)  The little ghost was actual cut from a small length of ghost ribbon that I had in my stash too!


Well, there you have it - I thank you for stopping by, and hope you will play along with us on our 2nd Make it Monday Sketch for March - or Sketch #36.  I can't wait to see what you all come up with !!

((HUGS)) ~ Sherri

Saturday, March 7, 2015

Challenge YOUrself # 16 - My Bucket List

It is time for The Challenge YOUrself Blog's March Challenge!!  This month we want to learn more about YOU 
and what your "DREAMS" are !

Here is the Challenge:
Challenge YOUrself #16:  Your Bucket List 
"What are some of the things you want to do in your life? Have you recently achieved something on your bucket list?  Tell us about it."
~*~*~*~*~*~*~*~*~*~*~*~
  
OH BOY - I really had to dig deep for this challenge - as I feel that I have been very blessed in my life, and have be so very lucky to have been able to do and see so many things.  
At first, I was finding it hard to come up with a list but once I started, the "dreams" kept coming! (Although it seems that most of my bucket list items have to do with travel.   I guess that is because it is something we love to do together as a family, and that is what makes our adventures so special.)

First I selected a silly selfie that I took of myself at a friend's wedding. I printed in Black and White - ( Quite by accident by the way - I don't know why it came out of my printer that way - I guess I need to refill my colored inks! - but I ended up actually liking it better!)  I also decided to add a smaller version of the same photo, that I printed on my little ZINK sticker printer, using a red filter.


Next it was time to decide what papers to use.  I had recently won a contest at Scrapbook.com, and was able to select $100 in product!  I was able to get most of BoBunny's Star-Crossed line, and decided to use LOTS of it for this layout!

Check it out-


I love all the goodies, but I think the film strip is my favorite - isn't it cool?!! I also pulled out an old piece of textured red paper that I've had in my stash "forever!" as I think went perfectly as a base with the Star-Crossed line.  I cut around the hexagon shapes on the edges of the honeycomb paper that I put on top of it, so it would peek through here and there.
**TIP - I  cut out a 10 x 10" square from the middle of that red paper - and only used the 1" frame, so that I still have a piece to use again in the future!  (I recently learned that this "Technique" is called "Gutting" your paper - who knew??!!) 


Here is my "BUCKET LIST"  Like I said, most of it has to do with travel.  What's on your Bucket List?


 I used Viva Decor's Maya Gold "Gold" Craft Paint - to paint the 2 Dusty Attic Chipboard Swirls, along with the torn piece of corrugated cardboard and the edges of the red feather. I 3D Pop Dotted the feathers. I even snuck in some black and white checked Washi Tape too!  I LOVE all the textures and layers.


I also used the Maya Gold paint on the edges of the center black and white photo, as well as the torn layers of patterned papers too. I like to fussy cut elements out of patterned papers to add as embellishments to my layouts too.  
OH - and while writing this post, and listing the items used, I learned that the film strip has an adhesive on the back of it! - I didn't know that when creating the layout, and decided to use my Tim Holtz Tiny Attacher to secure it to the page ( You can see it in the bottom left of the photo above.) -now I'll have to play with it again and see how that adhesive works! LOL!


I used the back of my paint brush to add a few dots of the Maya Gold paint "here and there" on the layout.  I used Ranger Distress Stains in Black Stoot and Tarnished Brass on some of the edges too. I used a black Sharpie marker to outline the title and some of the elements/embellishments on the page to make them "POP."   The gold title and arrow are from the Dear Lizzy Thickers "Royal" foil letter stickers pack (LOVE THEM!) The "53" wooden bingo calendar numbers are from Maya Road. (and yes, that is my age - but as you can see - I don't always act it! LOL!)

Here are the Bo Bunny Star-Crossed items that I used:
12 x 12 Collection Pack
Ephemera Pack
Sticker Stamps
Adhesive Film Sticker
Layered Chipboard
Buttons
Noteworthy Journaling Cards

As ALWAYS, thank you for stopping by my Blog.  I really hope you will play along with us at The Challenge YOUrself Blog, and I can't wait to see what is on YOUr Bucket List!

((HUGS)) ~ Sherri

Monday, March 2, 2015

The Memory Nest March Sketch #35 -Cruisin' with The Mouse!

It is time to revel the first sketch for the first Make it Monday, for the month of March, from The Memory Nest!  
This cool sketch was designed by Leslie Germain - 
and I really LOVE the design.  
All kinds of ideas were running through my head, as I flipped through photos to see what would work.  
I knew I wanted to try to see if I could fit 3 photos in the 3 horizontal squares and "pop" one larger photo over the 2 of them.


I finally decided on the 4 photos in the layout below.  They were taken on September 6, 2014, Embarkation Day - the start of our "Magical" 14 night Westbound Trans-Atlantic Disney Cruise, on The Disney Magic.  We sailed from Barcelona, Spain, to San Juan, Puerto Rico, and it truly was a "Voyage of a Lifetime" Below is my Design Team Inspiration layout.  Be sure to visit The Memory Nest, to see what all of the other Design Team Members came up with - and let your imagination run wild!!

The base sheet of paper and the cruise words triangle, are from Splash of Color -Magic Cruise Collection. I think the ship looks just like the Disney Cruise Line ships that we LOVE sailing on.  There is a little beach on the bottom right of the base page, that I covered with varying patterns and lenghts of Washi tape, as well as beach umbrellas and a palm tree on the bottom left, that I covered with embellishments, as we were embarking in Barcelona, Spain, and not from an island, at the time.   I separated the triangle word pattern piece on the top right of the page with a piece of Washi Tape.  I just didn't want it to be floating in mid air! LOL!
Here is a close up of the Mickey Head Pin with all of our "Ports of Call" on it.  This pin was made by one of the cruisers in our Facebook Group and we were able to purchase them.  I cut the back off of it and added it with a 3D Foam Dot, as it is the same logo we used to print on the shirts we wore the day we boarded and set sail - I thought it fit perfectly!  The little Mickey figure is actually a button that I cut the back off, and stuck on the same way! - So sorry for the shadows on these photos.  It's been cold and snowy around here lately with temperatures in the teens and even lower - this was a quick morning photo shoot outside on my deck, and the sun was not being my friend.


Here is another close up of some of the embellishments.  I used word stickers from Tim Holtz Chit Chat Words that I matted on red card stock to do a little journaling.  I've had that Mickey sticker forever - and like how the yellow picked up on the yellow of the horn funnels.  Oh - and that little card on the left with the ship and the map, is the card that the pin came on.  It shows the route that we took when sailing across the Atlantic!
I have had this title by Paper Wizard FOREVER!!  You know - the kind of thing that you buy, because you just LOVE it - BUT then hold on to it, because you don't want to "waste it" on just any old layout, and end up "saving it" for something special?? - Come on -I KNOW you've got stuff like that in your stash!! LOL! - Anyway - I thought it worked "PERFECTLY" on this layout, so I finally used it!  What do you think?

Thanks for stopping by - and please check out the sketch over at The Memory Nest Blog, to see how you can play along - AND - even win a Scrappy Prize! :-)
((HUGS)) ~ Sherri