Hi Everyone!
I went to a WONDERFUL Family Event yesterday! It was a Baby Shower for my AWESOME cousin Jenn!
Here is a picture of the gift that I made for her ~
Jenn is very special to me - she was a flower girl in my wedding, and even though we are "many" years apart in age, we just seem to connect on many levels. We both enjoy art, design, books, themes, events, and most of all, our wonderful family. I've even been told we kind of look a little bit alike - or at least people can easily tell we are related, and I am soo very proud of the AMAZING and successful woman she has become.
I am so excited that she is going to be welcoming her first baby into the world in a few weeks. I wish her and her husband Sean all the best with their new little bundle of joy! Oh, and they plan to name the baby after both of their Grandmothers - Sean's AUDREY and Jenn's (and mine too!) GRACE. Isn't that a BEAUTIFUL name!
 |
| LOVE YOU JENN! Can't wait to meet Audrey Grace! |
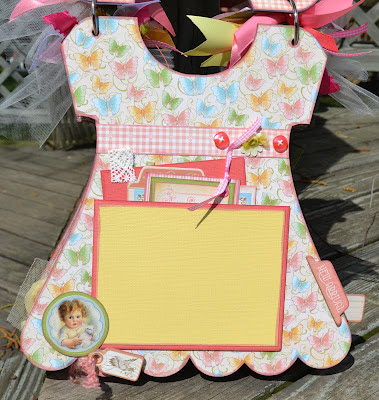
I wanted to make her something very special, and since she knows she is having a girl, I thought this little dress album from Want2Scrap was adorable - so I ordered the clear dress with the pinafore, and also the solid chipboard dress, and combined them into one album.
All of the other products to make this came from my Local Scrapbook Store ~ Scrap-a-Doodle Doo, on-line, and in Ramsey, NJ. ( and a few things were also shared from some special friends during a fun crop weekend that we attended a few weeks ago!)
When I saw Graphic 45's Little Darling's Collection - I just knew I had to use it for this book!
|
|
| The front cover page is a clear acrylic pinafore. I added BEAUTIFUL Yellow Lace, ( from my friend Diane - Thanks Diane!) and a beautiful flower that I've had in my stash, and some G45 elements. I forgot to take a picture of the back of the pinafore, and the first chipboard page, but you can see it through the acrylic. I decided to leave it plain, without photo mats, as the paper is just so beautiful. I just added a chipboard tag to the bottom right, as kind of a way to lift up, and turn the page. |
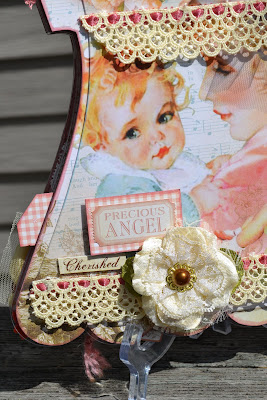 |
| Here is a close-up of the flower, paper, lace and the little paper embellishments. |
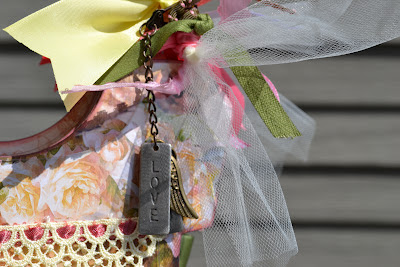 |
| In addition to tying on lots of ribbons and tulle to the rings holding the book together, ( I just love that look!) I attached a Tim Holtz Swivel Clasp, that I hung a LOVE and HOLD Tim Holtz Idea-ology Word Stick from -as well as an Angel Wing that I had in my stash, and a heart shaped key from BoBunny's Weekend Market Collection's Buttons. I love hanging charms from the rings on my mini books! |
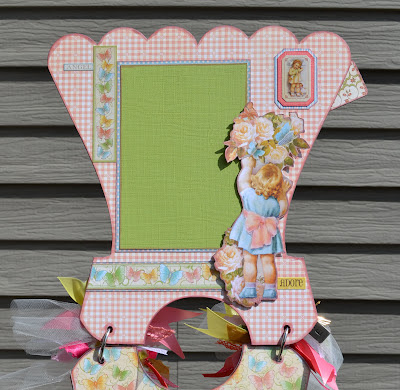 |
| This is the "back" or the reverse/flip side of the cover/first chipboard page. So everything on the back of the pages has to be added "upside down" on the dress shape. I fussy cut the little girl and roses out, and pop-dotted her with Helmar ZapDots. I did not put any adhesive where it overlapped the photo mat, so Jenn can just slip a picture of little Audrey Grace underneath it. All of the embellishments that overlap a photo mat were treated this way throughout the book. |
 |
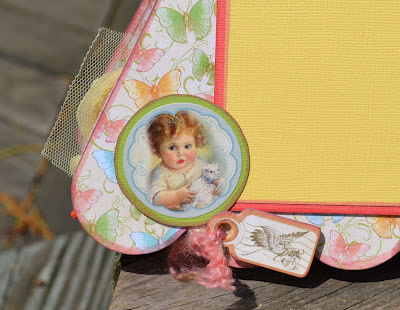
| This is the first full acrylic page. I just LOVE the picture of this "Little Darling" holding the lamb. |
 |
| This is the BACK of the Acrylic page. (you can see some of the back of the first page through it) An important note to keep in mind when working with Acrylic pages is - whatever goes on the front -needs to be covered or repeated in some way on the back. I learned this tip in a class from the very talented Sally Lynn MacDonald a few years ago. Here, Jenn can add a photo of the baby. |
 |
| Here is the first pocket. It was made by adhering the double photo mat on the 2 sides and bottom with Helmar 3D ZapDots. The tags that are slipped inside can be used for more photos, or journaling. |
 |
| I love the paper "ribbon" across the top of the dress, along with the buttons and little button flower. There are 3 tags in this pocket. I added an eyelet to one of them with my Crop-a-Dile, and tied a ribbon through it. |
 |
| Here is that cute little baby again - the little stork tag has some fibers tied through it, and is ZapDotted too, it is also a little tab to lift the page! You can also see how the beautiful Ranger Victorian Velvet Distress Stain accents and enhances the vintage look on the edges of the page. |
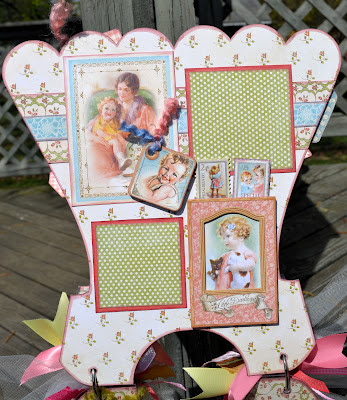 |
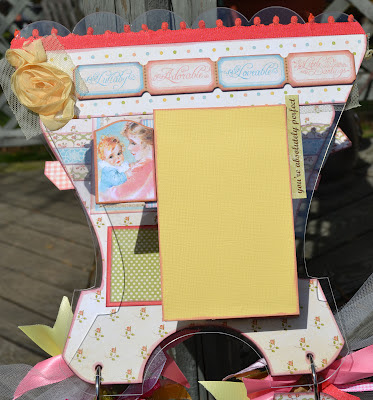
| Oh - I love this photo in the upper left, of the Mom with the little girl sitting on her lap, and the cute little baby square chipboard element that I tied with some more fibers, and ZapDotted too. The little "postage stamp" tabs pull up from the pink frame, and offer another chance to add photos ( other than the 2 polka dot mats on the page) or even some journaling. |
 |
| Another "clear" page. The "Beautiful" chipboard element is a custom made "DOO DAD" only available at Scrap-a-Doodle Doo! I painted it with Ranger's Adirondack Paint Dauber, in Lemonade, then gave it a coat of Golden Goddess Glimmer Glam from Tattered Angels. I Love the "Sent from Heaven" Tag too! |
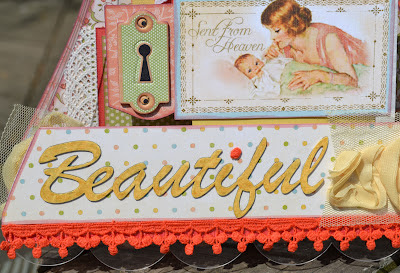 |
| Here is a close-up of the Doo Dad, along with the beautiful fringe ribbon, and the lovely yellow flower ribbon, both contributed from my 2 friends! ( THANKS PATTIE and MARIANNE!) |
 |
| Here is the back of the Acrylic Page with a yellow mat just waiting for a photo of the baby! I added a piece of grossgrain ribbon, in almost the same color as the decorative ribbon at the bottom of the other side, so that the adhesive for both is not visable, as they cover each other. |
 |
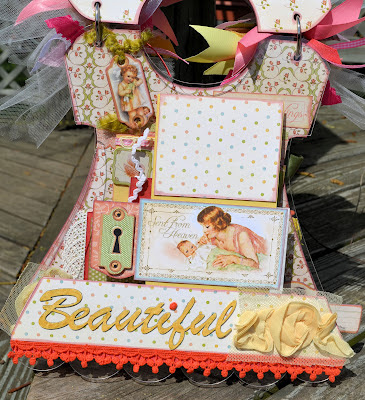
| This sweet little page features another pocket with lots of tags and a green and white polka dot photo mat on the front. The chipboard elements have been raised with ZaptDots, and the top piece has fiber tied through it. Oh - the big button on the bottom has been tied with some white ric rac ribbon, and it has been glued using Helmar's Liquid ScrapDots -- AMAZING STUFF! |
 |
| Isn't the little yellow flower ribbon adorable ( from Maya Road) and the pom-pom fringe was another gift from Pattie ( Thanks again!) The little postage stamps that come with this G45 paper collection are just soo sweet!! |
 |
| I added a pearl swirll from my stash of scrap stuff on this page - I just think the little baby with the bird and the little cherub postage stamp are soo adorable! |
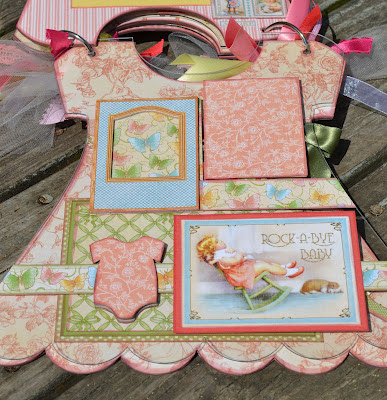 |
Here is the last clear page - I also tried to take into consideration what the chipboard page underneath the clear page looks like when designing the clear page, so that they will complement each other. I love the Rock-A-Bye Baby tag - I rocked both of my "little boys" to sleep, and I still cherish that special time - even 23 and 17 years later! The little chipboard "onesie" is from Fab Scraps.
It looks like I forgot to take a picture of the "back side" of that clear page so please
USE YOUR IMAGINATION "HERE!" |
 |
| Here is the last chipboard page of the little dress album. The photo mat / pocket is actually TRIPLE matted - and again only adhered on the sides and bottom with ZapDots and filled with lots of pull out tags for additonal photos and journaling. The little green bow on the dress was given to my by my friend Karrie - isn't it just PERFECT?! |
 |
| Finally, here is the back of the "dress" I added the same pretty yellow lace that is on the front, to bring it all together. Jenn can add a photo at the bottom, or just leave it plain too. |
All of the edges of all of the papers were inked/distressed with Ranger's / Tim Holtz Victorian Velvet Distress Stain - I just LOVE this stuff - and how easy it is to apply!
The papers, chipboard elements and stickers are all from Graphic 45's Little Darlings Collection. There are a few stickers that I added from a sheet of Simple Stories Baby Steps Collection
I used HELMAR's ZapDots to make the pockets, and to raise some of the elements, along with HELMAR's 450 Quick Dry Liquid Glue to apply all of the papers to the Acrylic and Chipboard pages.
If you are not familiar with HELMAR - check them out - I LOVE their Sticky Stuff!!
I hope you enjoyed looking, as much as I enjoyed making this very special gift. I hope it inspires you to try to use some of the tips and techniques I've shared.
Thanks for looking - would love to know you were here - so feel free to say "HI!" and leave me some "Bloggy Love!" I'd love to hear from you!
((HUGS)) ~ Sherri