ALL of the items used in this layout were purchased at SCRAP-A-DOODLE DOO too!
Our son Jake took this photo of my hubby and I, while we visited EPCOT this past December - I loved the colors, and couldn't wait to use the photo in this layout! I have to THANK my friend NATASHA for all her inspiration and tutorials, and for sharing of her ideas and AMAZING talent! Check out her BLOG to see her AWESOME WORK!!
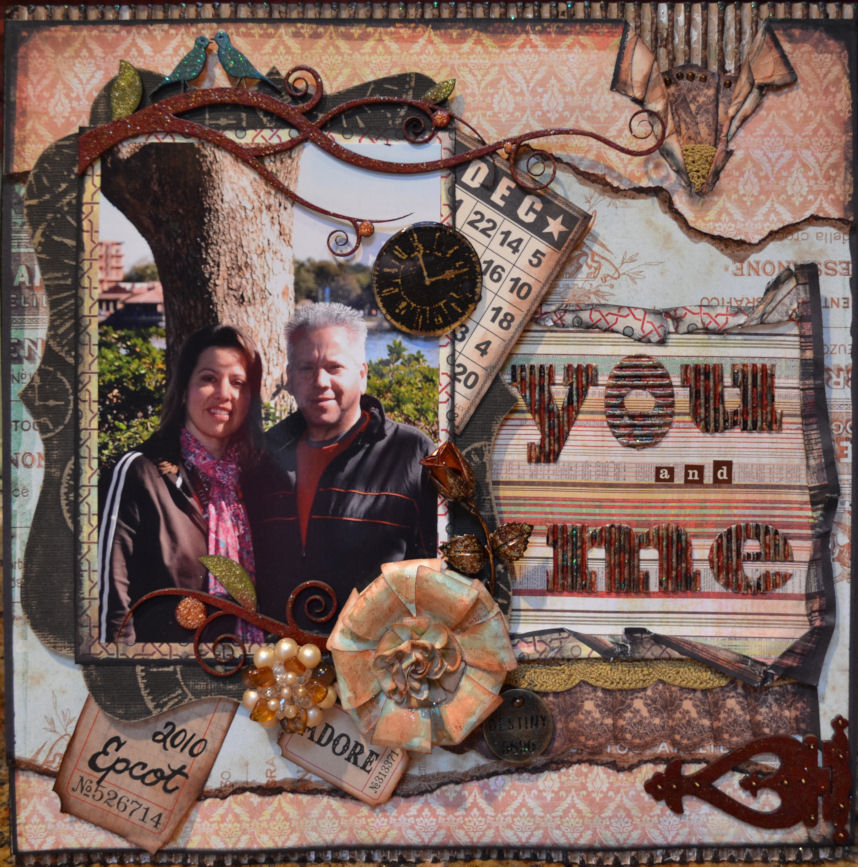 |
| I used layers of Basic Grey's Curio Collection that I water distressed, tore and folded, along with Core'dinations Black Magic, and LOTS of embellishments! |
 |
| I LUV this Dusty Attic Swirl! I actually cut off a piec of it and added it at the bottom of the picture too! I inked the leaves with Peeled Paint Distress Ink, the Birds with Faded Jeans Distress Ink, and the vine/swirl with Fired Brick Distress ink. I added Waterfall and Orange Crush Glimmer Glaze by Tattered Angels, along with Espresso, Be Positive, and Mermaid Glimmer Glaze, then some Shabby Shutters, Vintage Photo, Dried Marigold and Frayed Burlap Distress Stickles! This stuff just LOVES layers and adds so much to your page ( you can find it at Scrap-a-doodledoo.com too!) |
 |
| I first inked the Dusty Attic Hinge with Fired Brick Distress Stain, (love this stuff too!) then a coat of Tattered Angels' BE Positive Glimmer Glam, and finally some Vintage Photo Distress Stickles. The pearls for brads were made with a Bronze Pearl Pen - the brown "lace" is paper that was water distressed inked and folded. I used up lots of the Tim Holtz embellishments that I've been "collecting" too! |
 |
| Ouchless Cardboard is my "friend" and a great base. I added a little white acrylic paint, then some Espresso and Be Positive Glimmer Glam. I added some Bronze Pearls from a Pearl Pen to the faux lace, and a little sneak piece of real lace in there too! - look at that luscious Dusty Attic swirl too! |
 |
| This flower was made out of beige cardstock, that I cut out on the Cricut - I used Natasha Aguirre's Gardenia Flower technique, inked the edges with Mocha Mama Powder Puff Chalk, and used a paint brush to add some Sugar Maple and Turquoise Blue Glimmer Mist, and topped it all off with Dried Marigold Distress Stickles. The Corrugated Kraft Alphas by Jillibean Soup were inked up with just about all of the Glimmer Glaze and Glam previously listed, along with some Mermaid Glimmer Glam for added sparkle! |
 |
| Here is a side view of the flower - I love how it came out! Layers are my friend - if you haven't noticed! Check out Natasha's tutorial on her blog -the flowers are FUN to make too! Oh - and THANKS to my good friend Pattie for sharing her costume jewelry, I love the dimension and texture it adds to the layout too! Well -I hope you like it, and it inspires you too! PLEASE go ahead and leave me some LOVE - I'd like to know you were here! Thanks, Sherri |